How to generate a battery report on Windows 10
How to generate a battery report on Windows 10
Battery life can often become a touchy subject as it’s affected by how you use your Windows 10 PC. Gaming will kill your battery fast, but general web browsing (depending on browser) and word processing will take much longer to deplete the battery. Unfortunately, Microsoft no longer gives an estimated time remaining on their own hardware so it’s tough to say how much battery you have left. It should be noted that this test will not work on Windows 10 desktop PCs for obvious reason and this test is only for portable Windows 10 devices, including laptops.
If you are wondering what apps are affecting your battery life on your Windows 10 PC, there are a couple of things you can do. There are several individual options to check what affects your Windows 10 PC’s battery life. First, you can check your what apps may be negatively affecting battery life.
- Go to Settings.
- Go to System.
- Go to Battery.
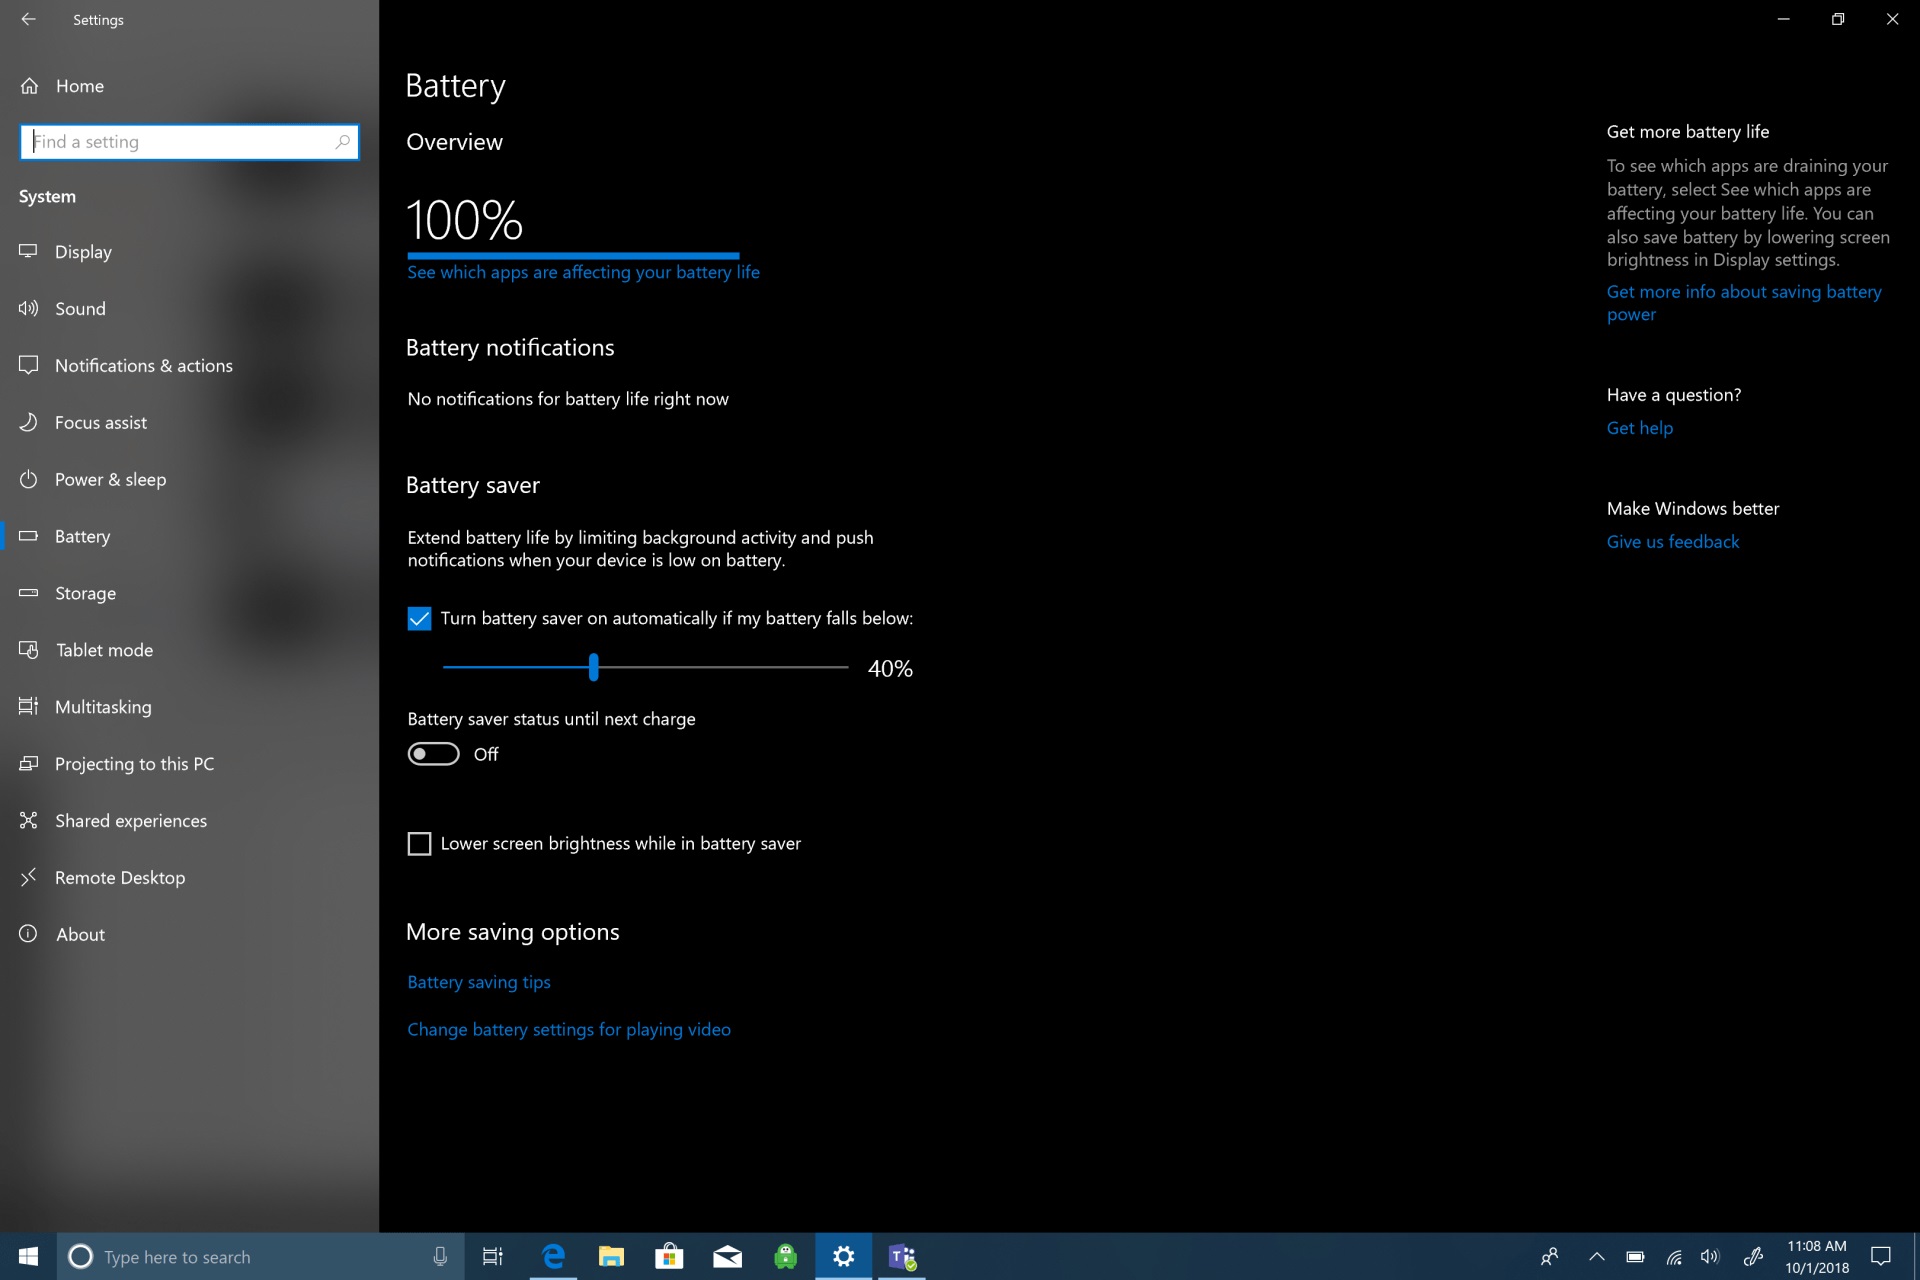
Under Battery, go to “See which apps are affecting your battery life,” located just under the battery life percentage as show in the picture below.
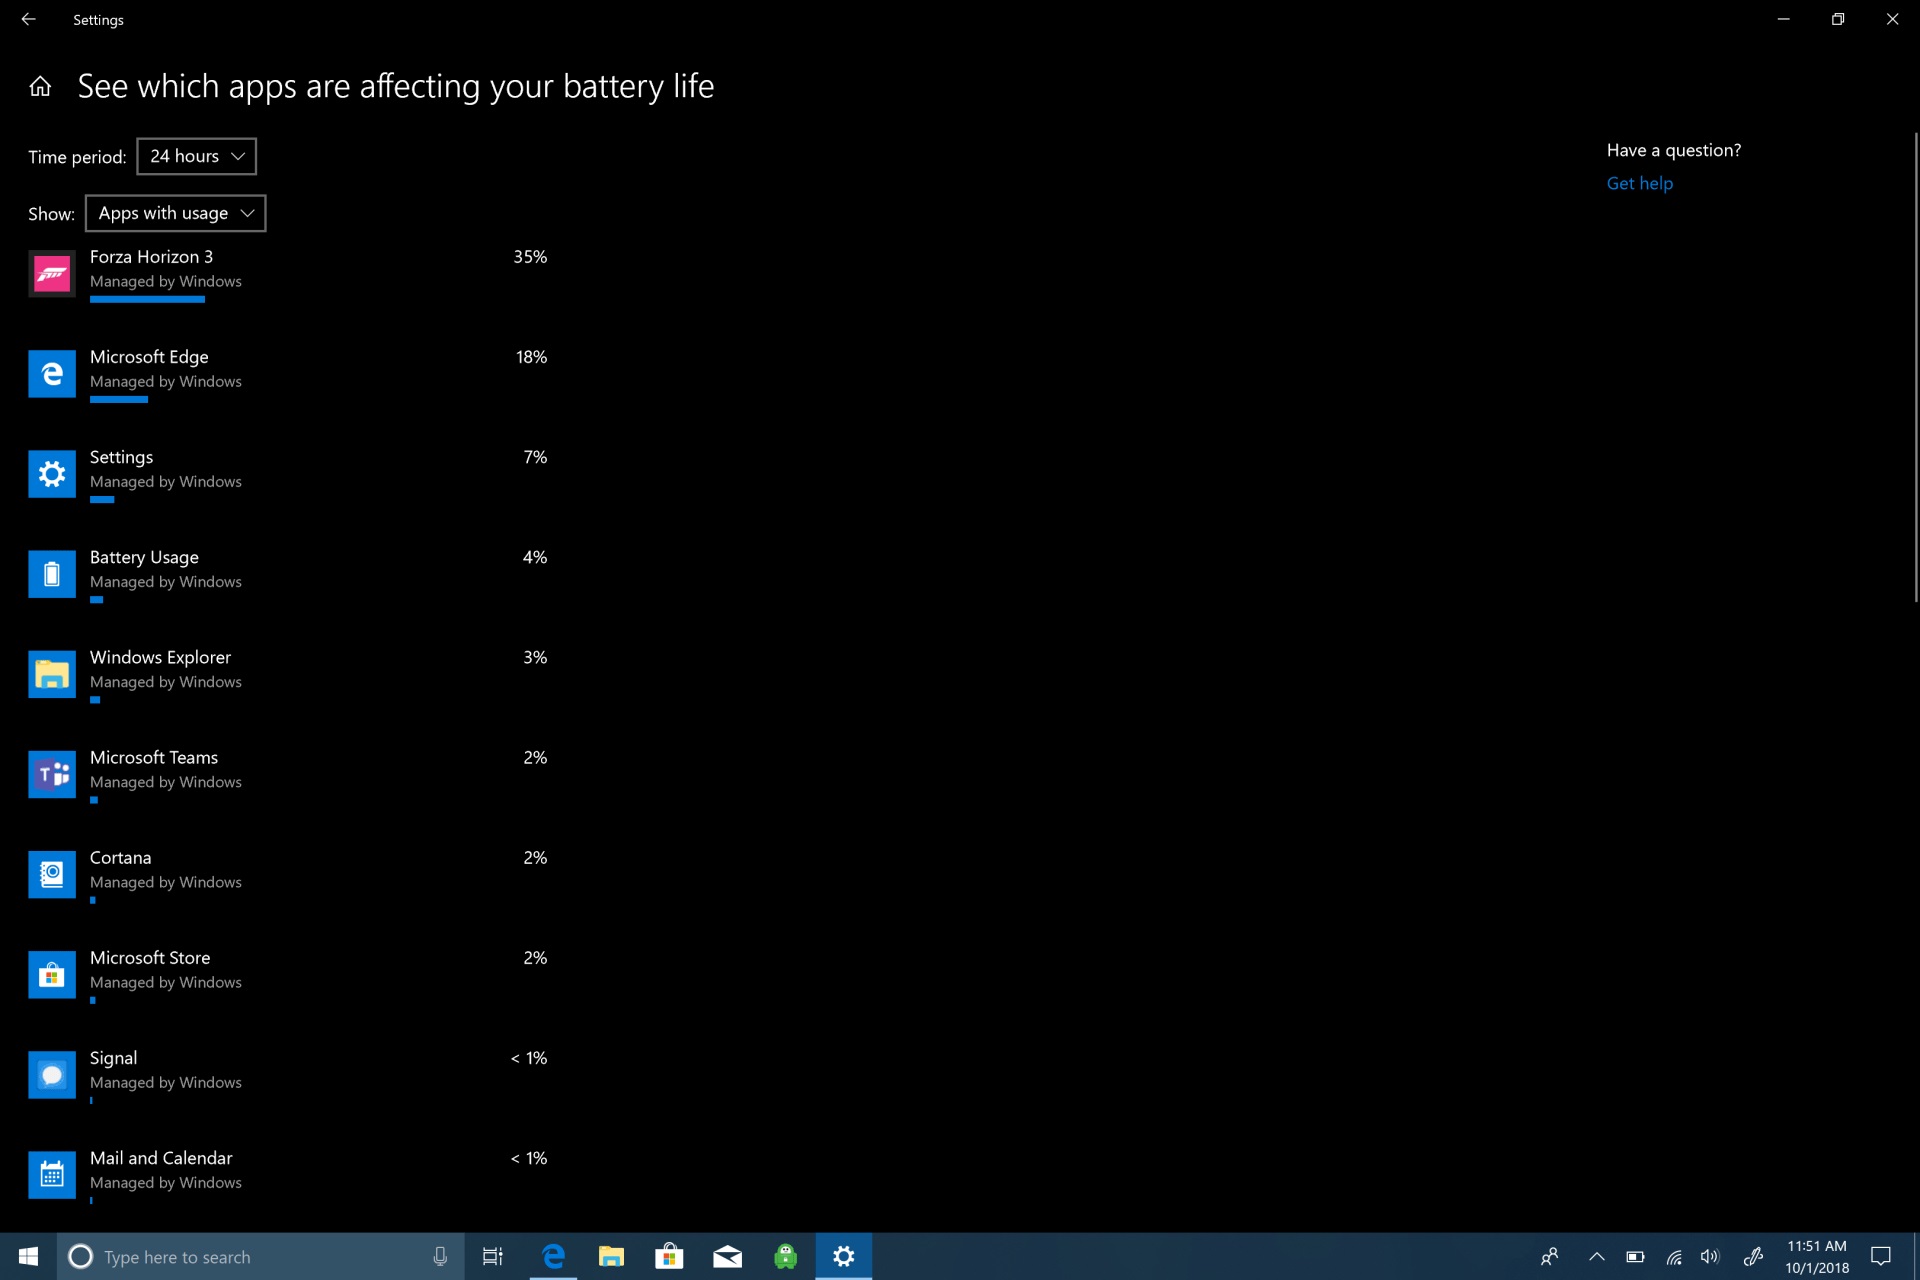
You’ll be shown a list of Windows 10 apps and how much resources they use. Time periods range from 6 hours, 24 hours, and 1 week, and you can show apps by usage, all apps, or always allowed apps.
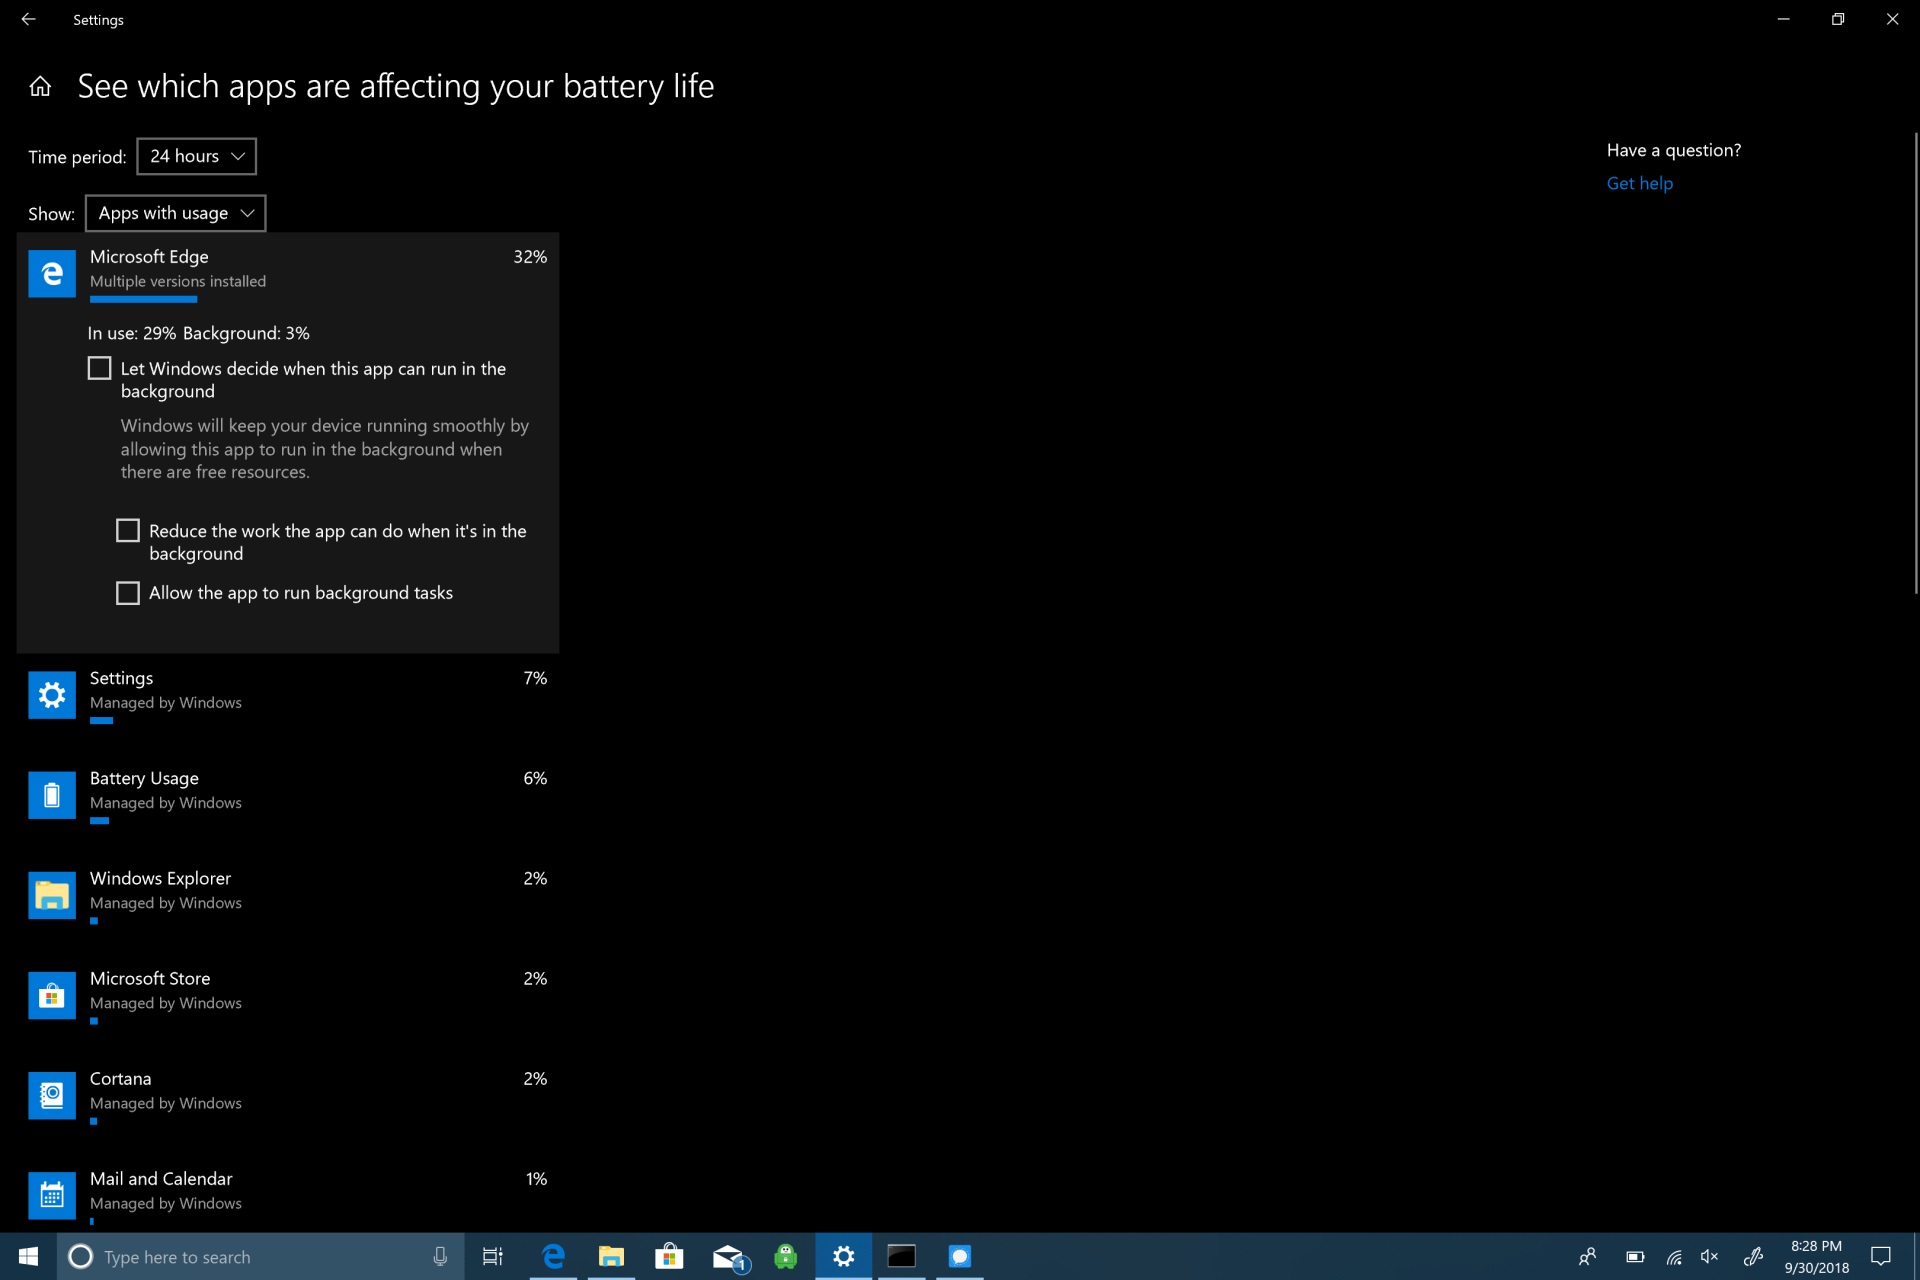
If you click on any of the apps, you will be given more options to control how the app uses resources Windows 10. You can let Windows manage the app and decide when this app can run in the background. Otherwise, you can reduce the work the app can do when it’s in the background or allow the app to run background tasks. Unless you need a particular app to be run in the background 24/7, it is usually best to let Windows to manage how apps to reduce the amount of resources and battery the app will ultimately use.
To monitor the app you are looking to get a more in-depth view of your battery life, there are more in-depth options available in Windows 10. Here’s what you need to do.
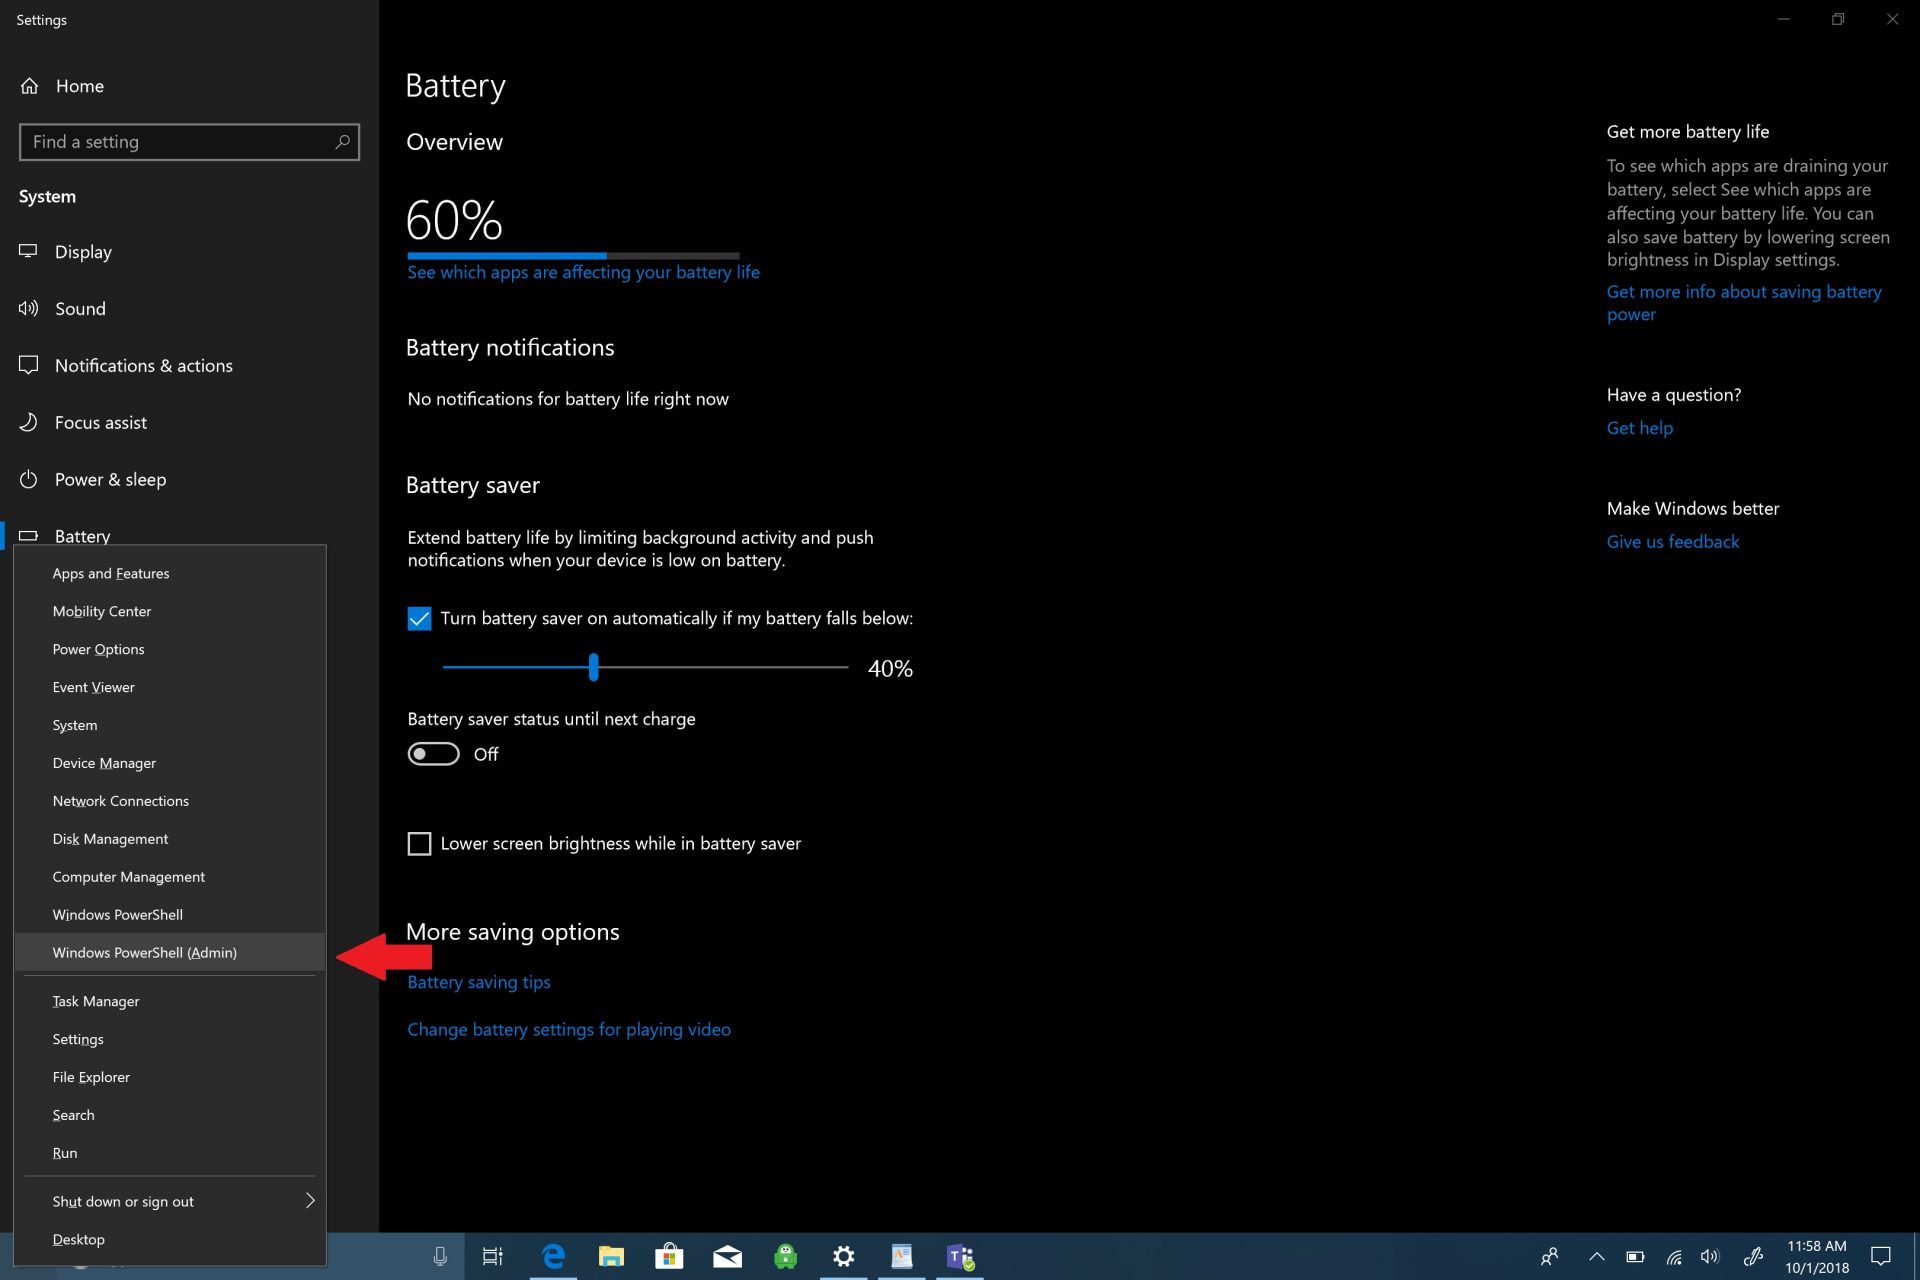
1. Right-click the Start menu to bring up the menu.
2. Pick Windows PowerShell (Admin).
3. Yes to UAC (User Account Control) prompt.
4. In Windows PowerShell, copy and paste “powercfg /batteryreport” into the Windows PowerShell window. In Windows PowerShell, the battery report will be saved in whatever directory you are in. When you open Windows PowerShell, you will be taken to a “C:\WINDOWS\system32\.” However, if you want to save the battery report to a specific folder, you can do so by typing the following command: powercfg /batteryreport /output “C:\battery-report.html” By typing this command, you will save the battery report to the C:\ Drive making it easier to find when you need it.
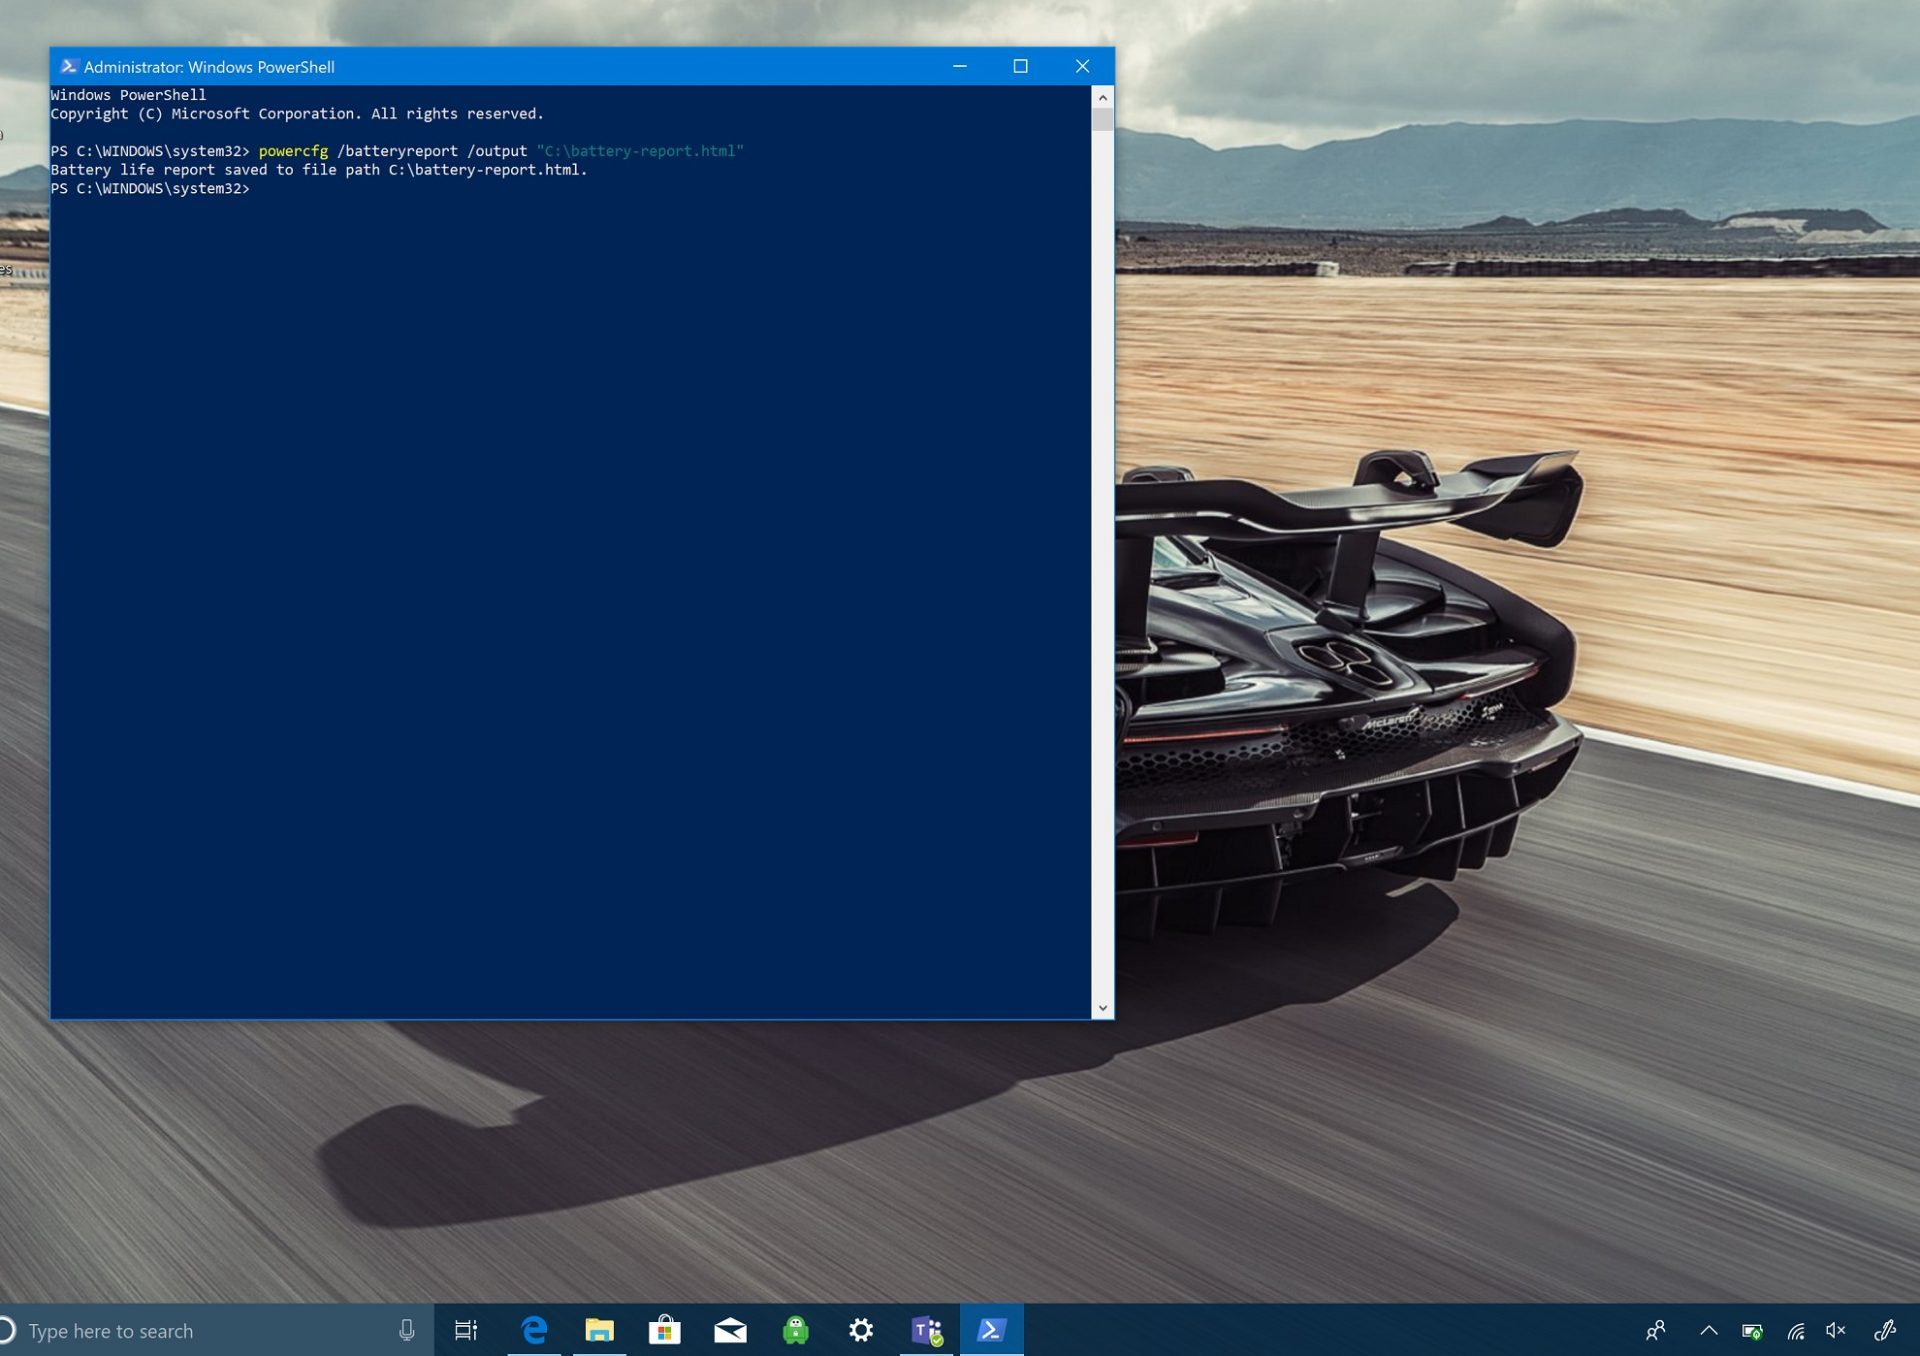
5. Open the battery report. Once the battery report is generated, go to the destination folder and open the file. Look for the file labeled battery-report.html. The file will open in your default browser.
What does my Battery report mean?
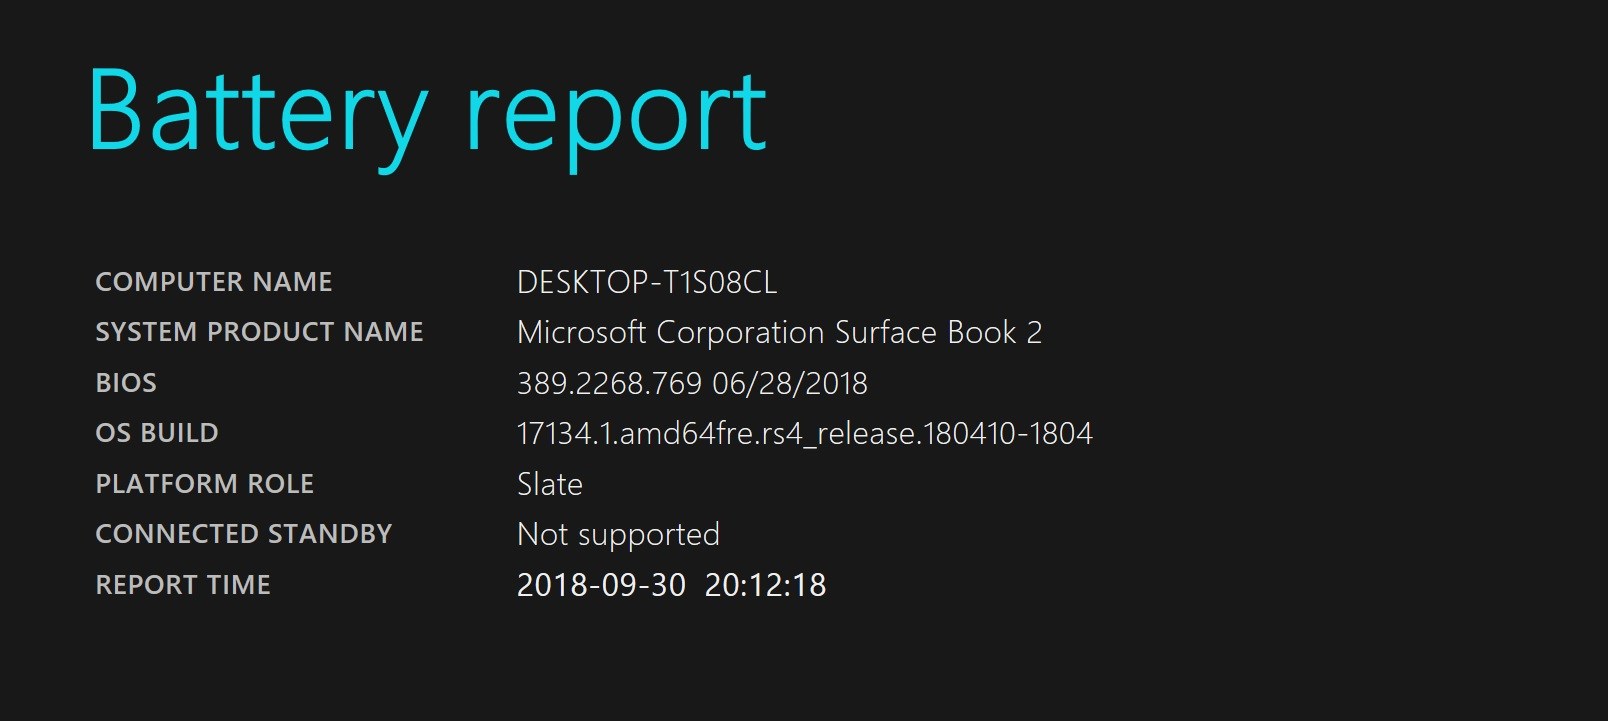
Once your battery report is generated, it can be confusing for new Windows 10 users to know exactly what they are looking at. Here’s what to make of your battery report. The first area of your battery report shows the hardware parameters, OS version, and other details specific to your Windows 10 PC.
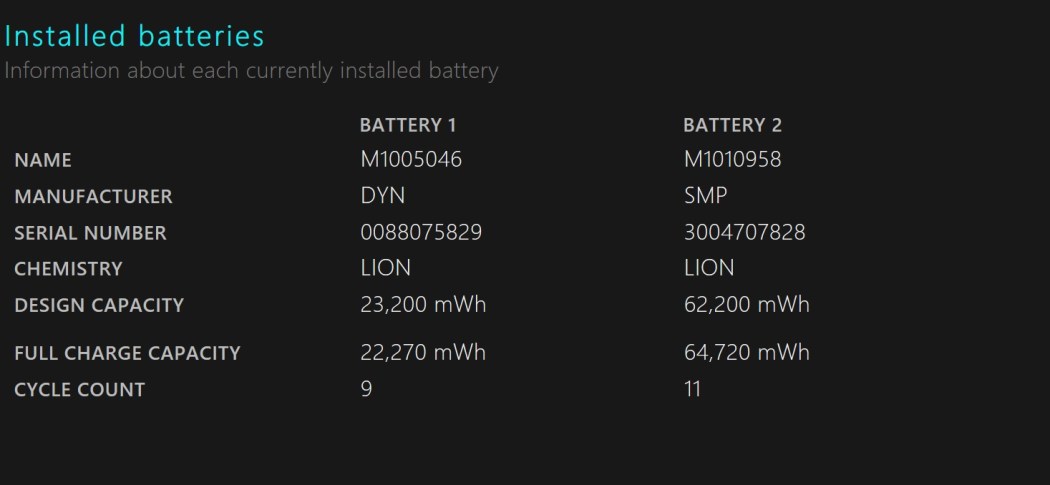
The next section is Installed batteries and gives you general information of the battery installed on your computer. The battery information includes the battery name, manufacturer, chemistry, design capacity and full charge capacity.
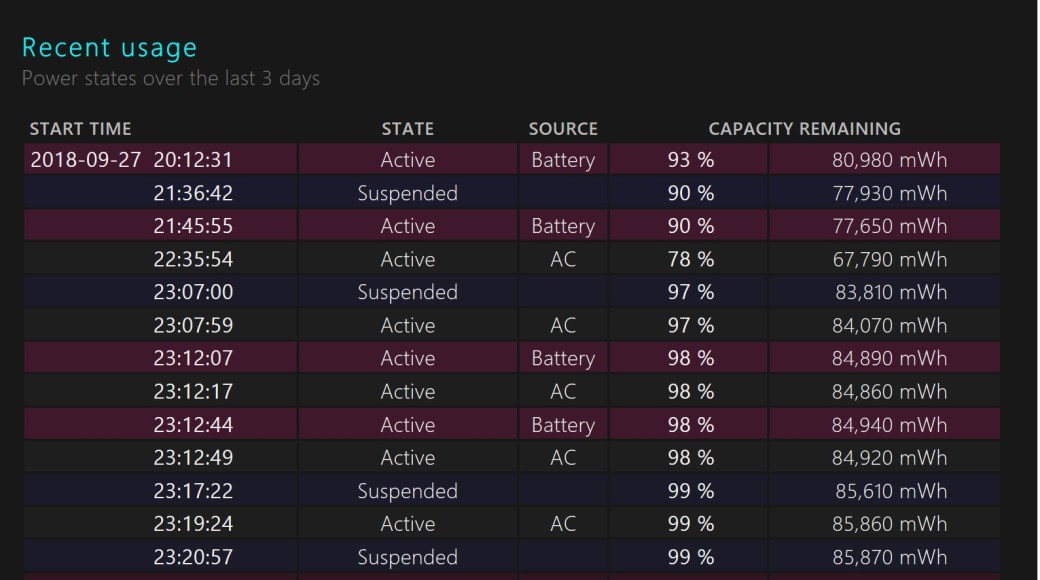
Recent usage shows the dates and times that you used the battery, along with battery state (active, suspended), power source and remaining battery capacity. Recent usage gives you a record of when you used your Windows 10 laptop went to sleep, became active, and was charged using AC power. Recent usage also indicates the remaining mWh capacity. This is the record of when the laptop went to sleep, became active, as well as when your PC is charged with AC power, along with the corresponding mWh remaining capacity.
Below recent usage, there is also a helpful battery usage graph to help show you how your battery drains over the last three days. At this time, there is not an option to see farther than the previous 3 days in the battery report. Personally, I’d like to see how your battery drains over a full week.
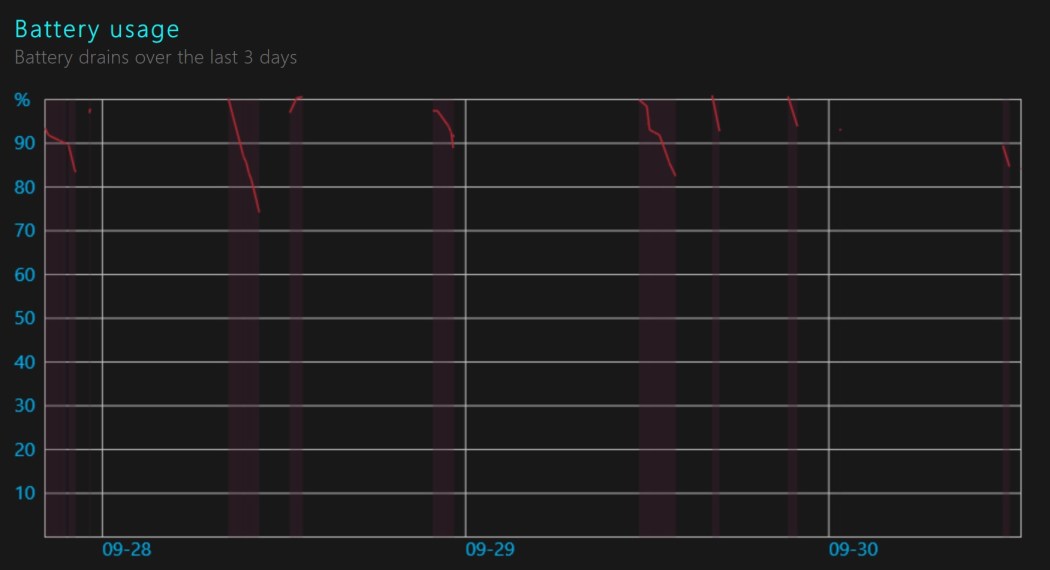
Other areas of the battery report include usage history and battery capacity history. These are good areas to stay updated on for your Windows 10 PC battery health. However, the most important section for most Windows 10 users will be battery life estimates. Battery life estimates are what Windows 10 estimates you can can get on the device with regular usage.
This feedback is more stable and accurate than the live estimate found by clicking the your computer’s battery icon. Unfortunately, you cannot see the remaining battery life on your Windows 10 PC if you have a Microsoft Surface product by clicking on the battery icon. For whatever reason, Microsoft removed this option.
If you are having similar problems, you now know how to get a battery report on your Windows 10 laptop to see how your battery is performing and to make sure there are no battery-related issues.

